Walking Basement converted into the Rental Unit
Bachelor Rental Unit
Amsterdam, Netherlands
Existing Condition of the Space
Have you ever found yourself in a situation where you have a room that serves no specific purpose and ends up becoming a dumping ground for all sorts of unnecessary furniture? It's not uncommon to accumulate clutter over time, but eventually, you might find yourself wanting to reclaim that space.
By creating a beautiful and functional unit, you can transform that room into an asset that adds value to your home.
Mood Board for a new space >
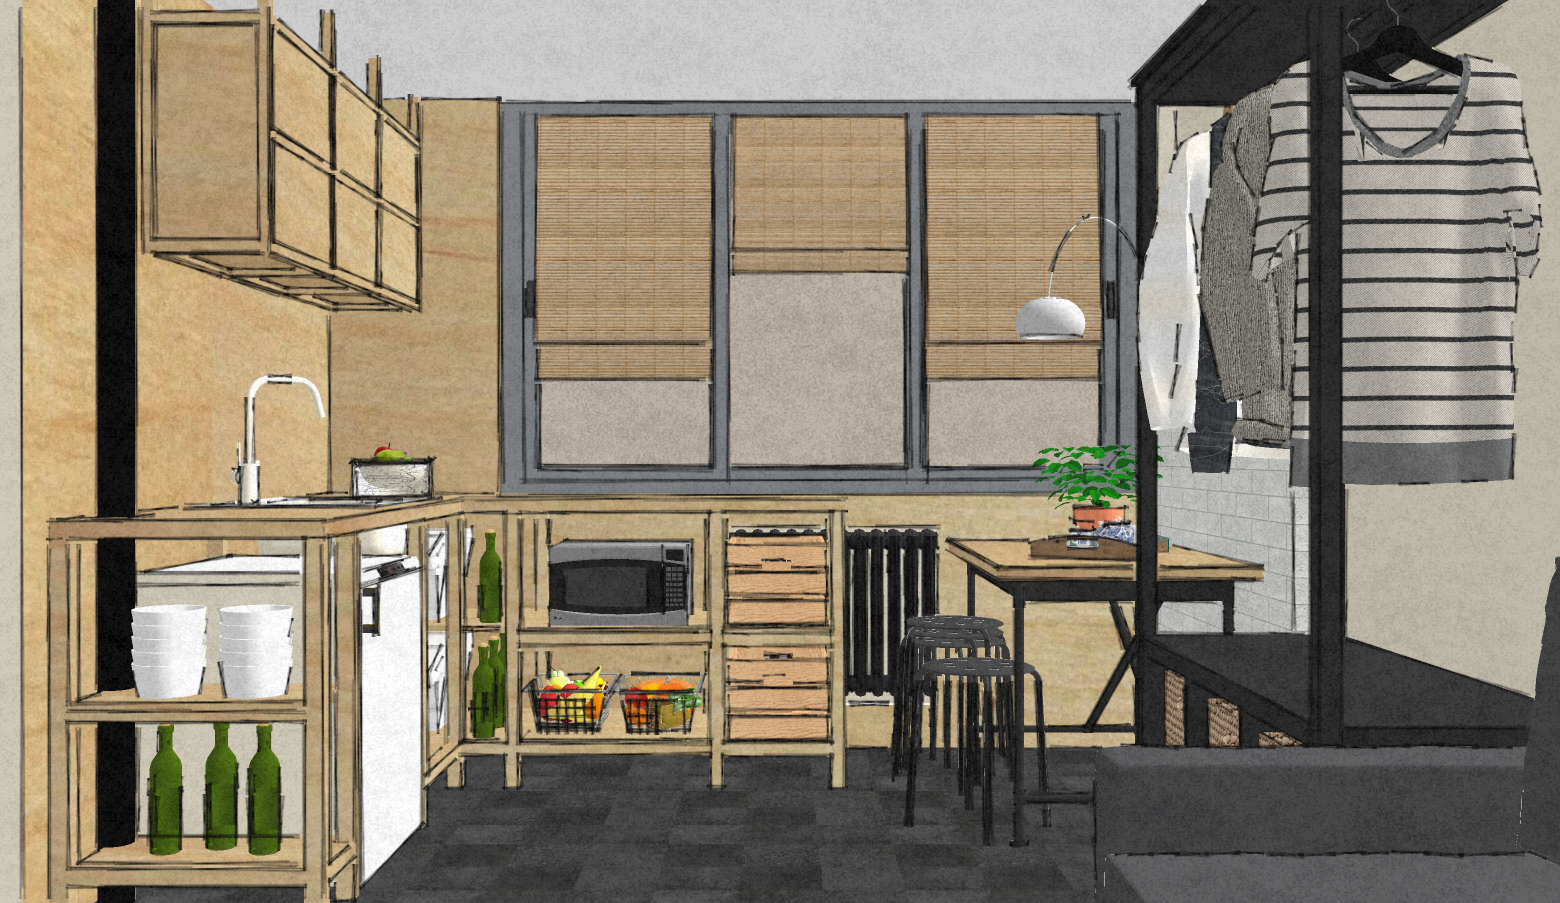
Kitchen Concept with open Cabinets

Rental Unit / Bachelor Unit / Tiny Unit Layout

Open Concept Storage / Wardrobe
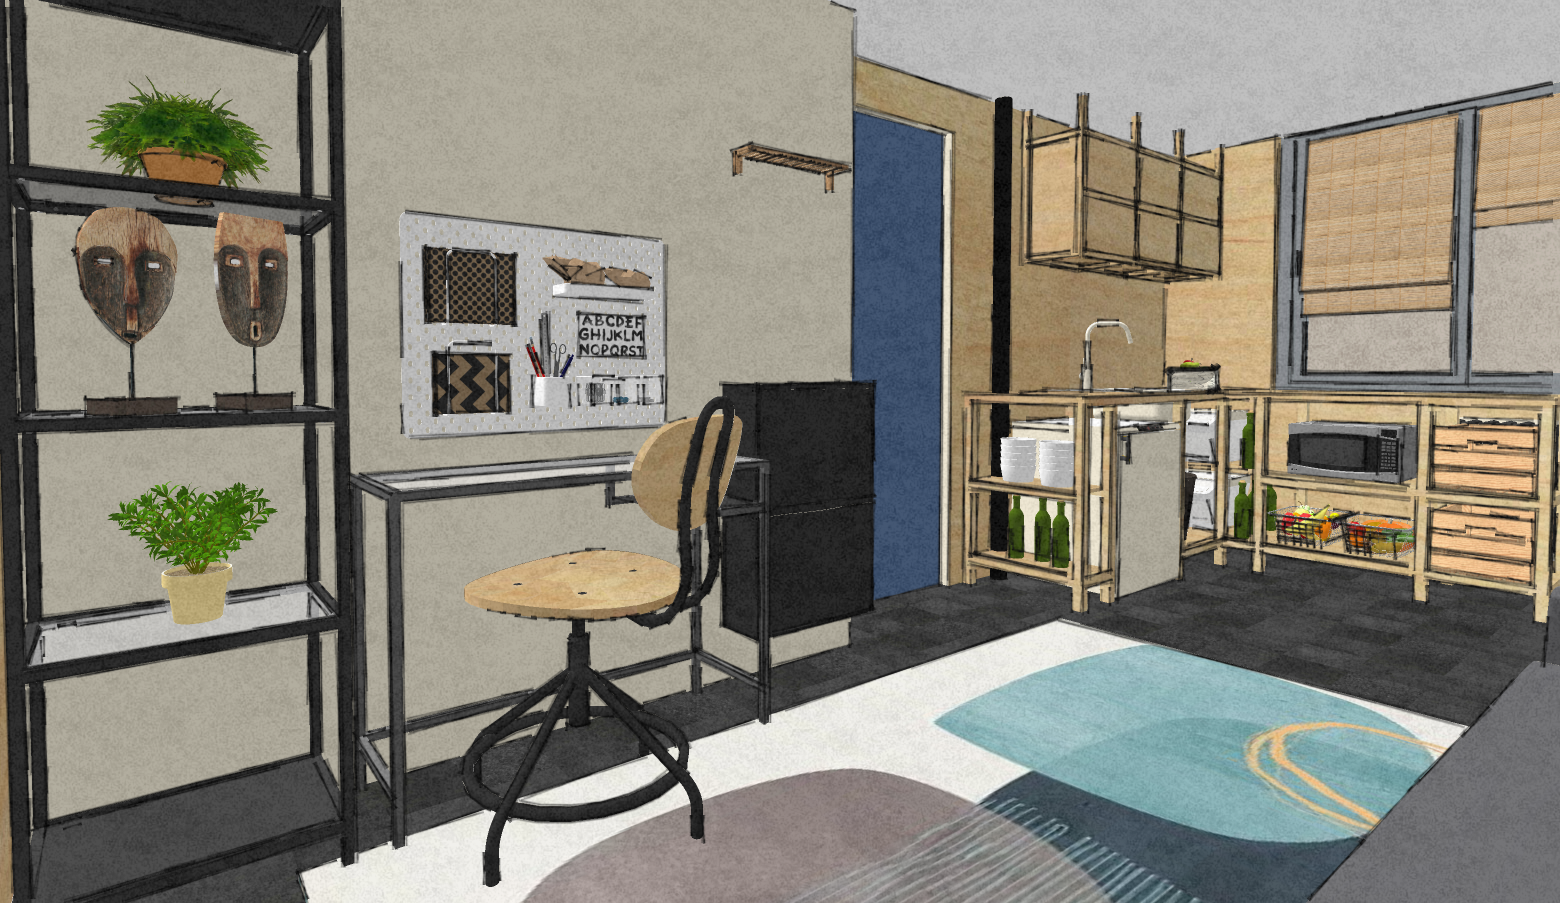
Home Office for Tiny Space
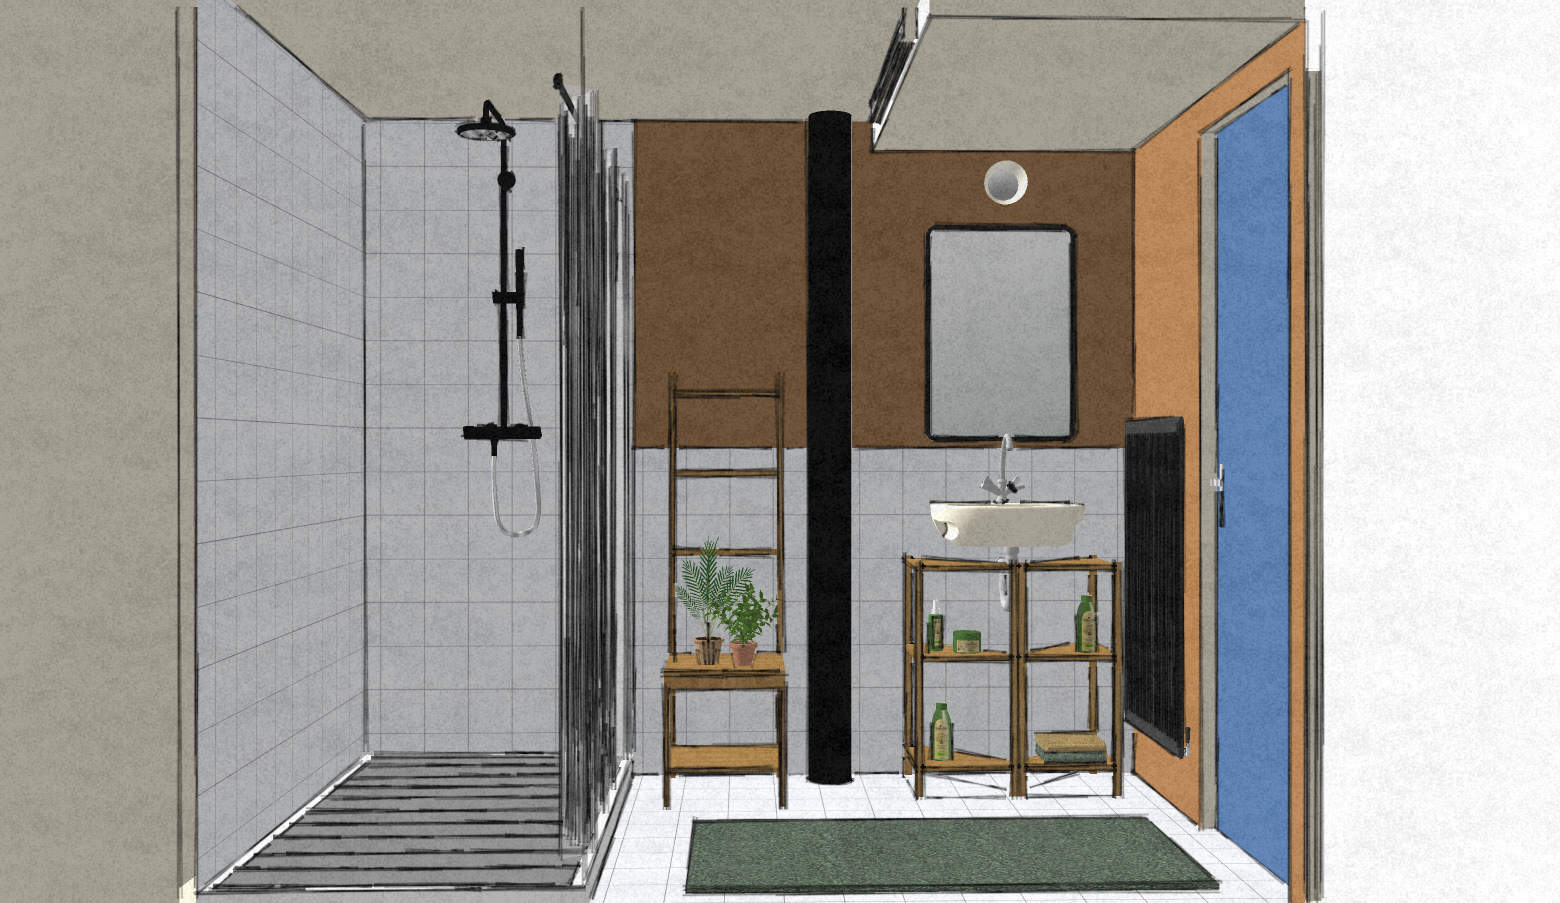
Linear Shower

Shower with a Curtain
Concept Sketches
next step Sketches
Once all the requirements and needs of the project have been discussed and determined, we can move on to creating a layout and sketches to give a general understanding of the space, furniture, and equipment needed (with most of it sourced from IKEA).
In this particular project, we had a small space that needed to include a kitchen with a dining area and a convertible living area that could also serve as a sleeping place. Due to the shared nature of the bathroom, the access was made from the hallway.
For the kitchen area, an open concept was used, with square wood studs, plywood for the shelves, and sealed plywood for the countertop. IKEA boxes were used for the inserts, while the dining area was furnished with IKEA furniture (with an itemized shopping list included in the project).
The living/sleeping/office area also used open concept furniture to maximize space and avoid overcrowding. Most of the furniture was made of metal structures with glass and wood inserts, with a convertible sofa and area rug adding warmth to the space.
The kitchen area's wall finishes consisted of plywood panels, while the living area was painted. In the bathroom, a tiled shower and backsplash were installed at the sink wall, with the rest painted. The floor in the unit remained as is, while the bathroom was tiled with regular square white porcelain.
drawings as needed
Depending on the project the drawings are set very if at all needed. For this unit, we used the set in the pictures below:
+ wall installation plan
+ itemized furniture layout
+ floor plan
+ electrical outlets layout
+ water outlets layout
+ walls elevation
+ kitchen cabinetry dimensions
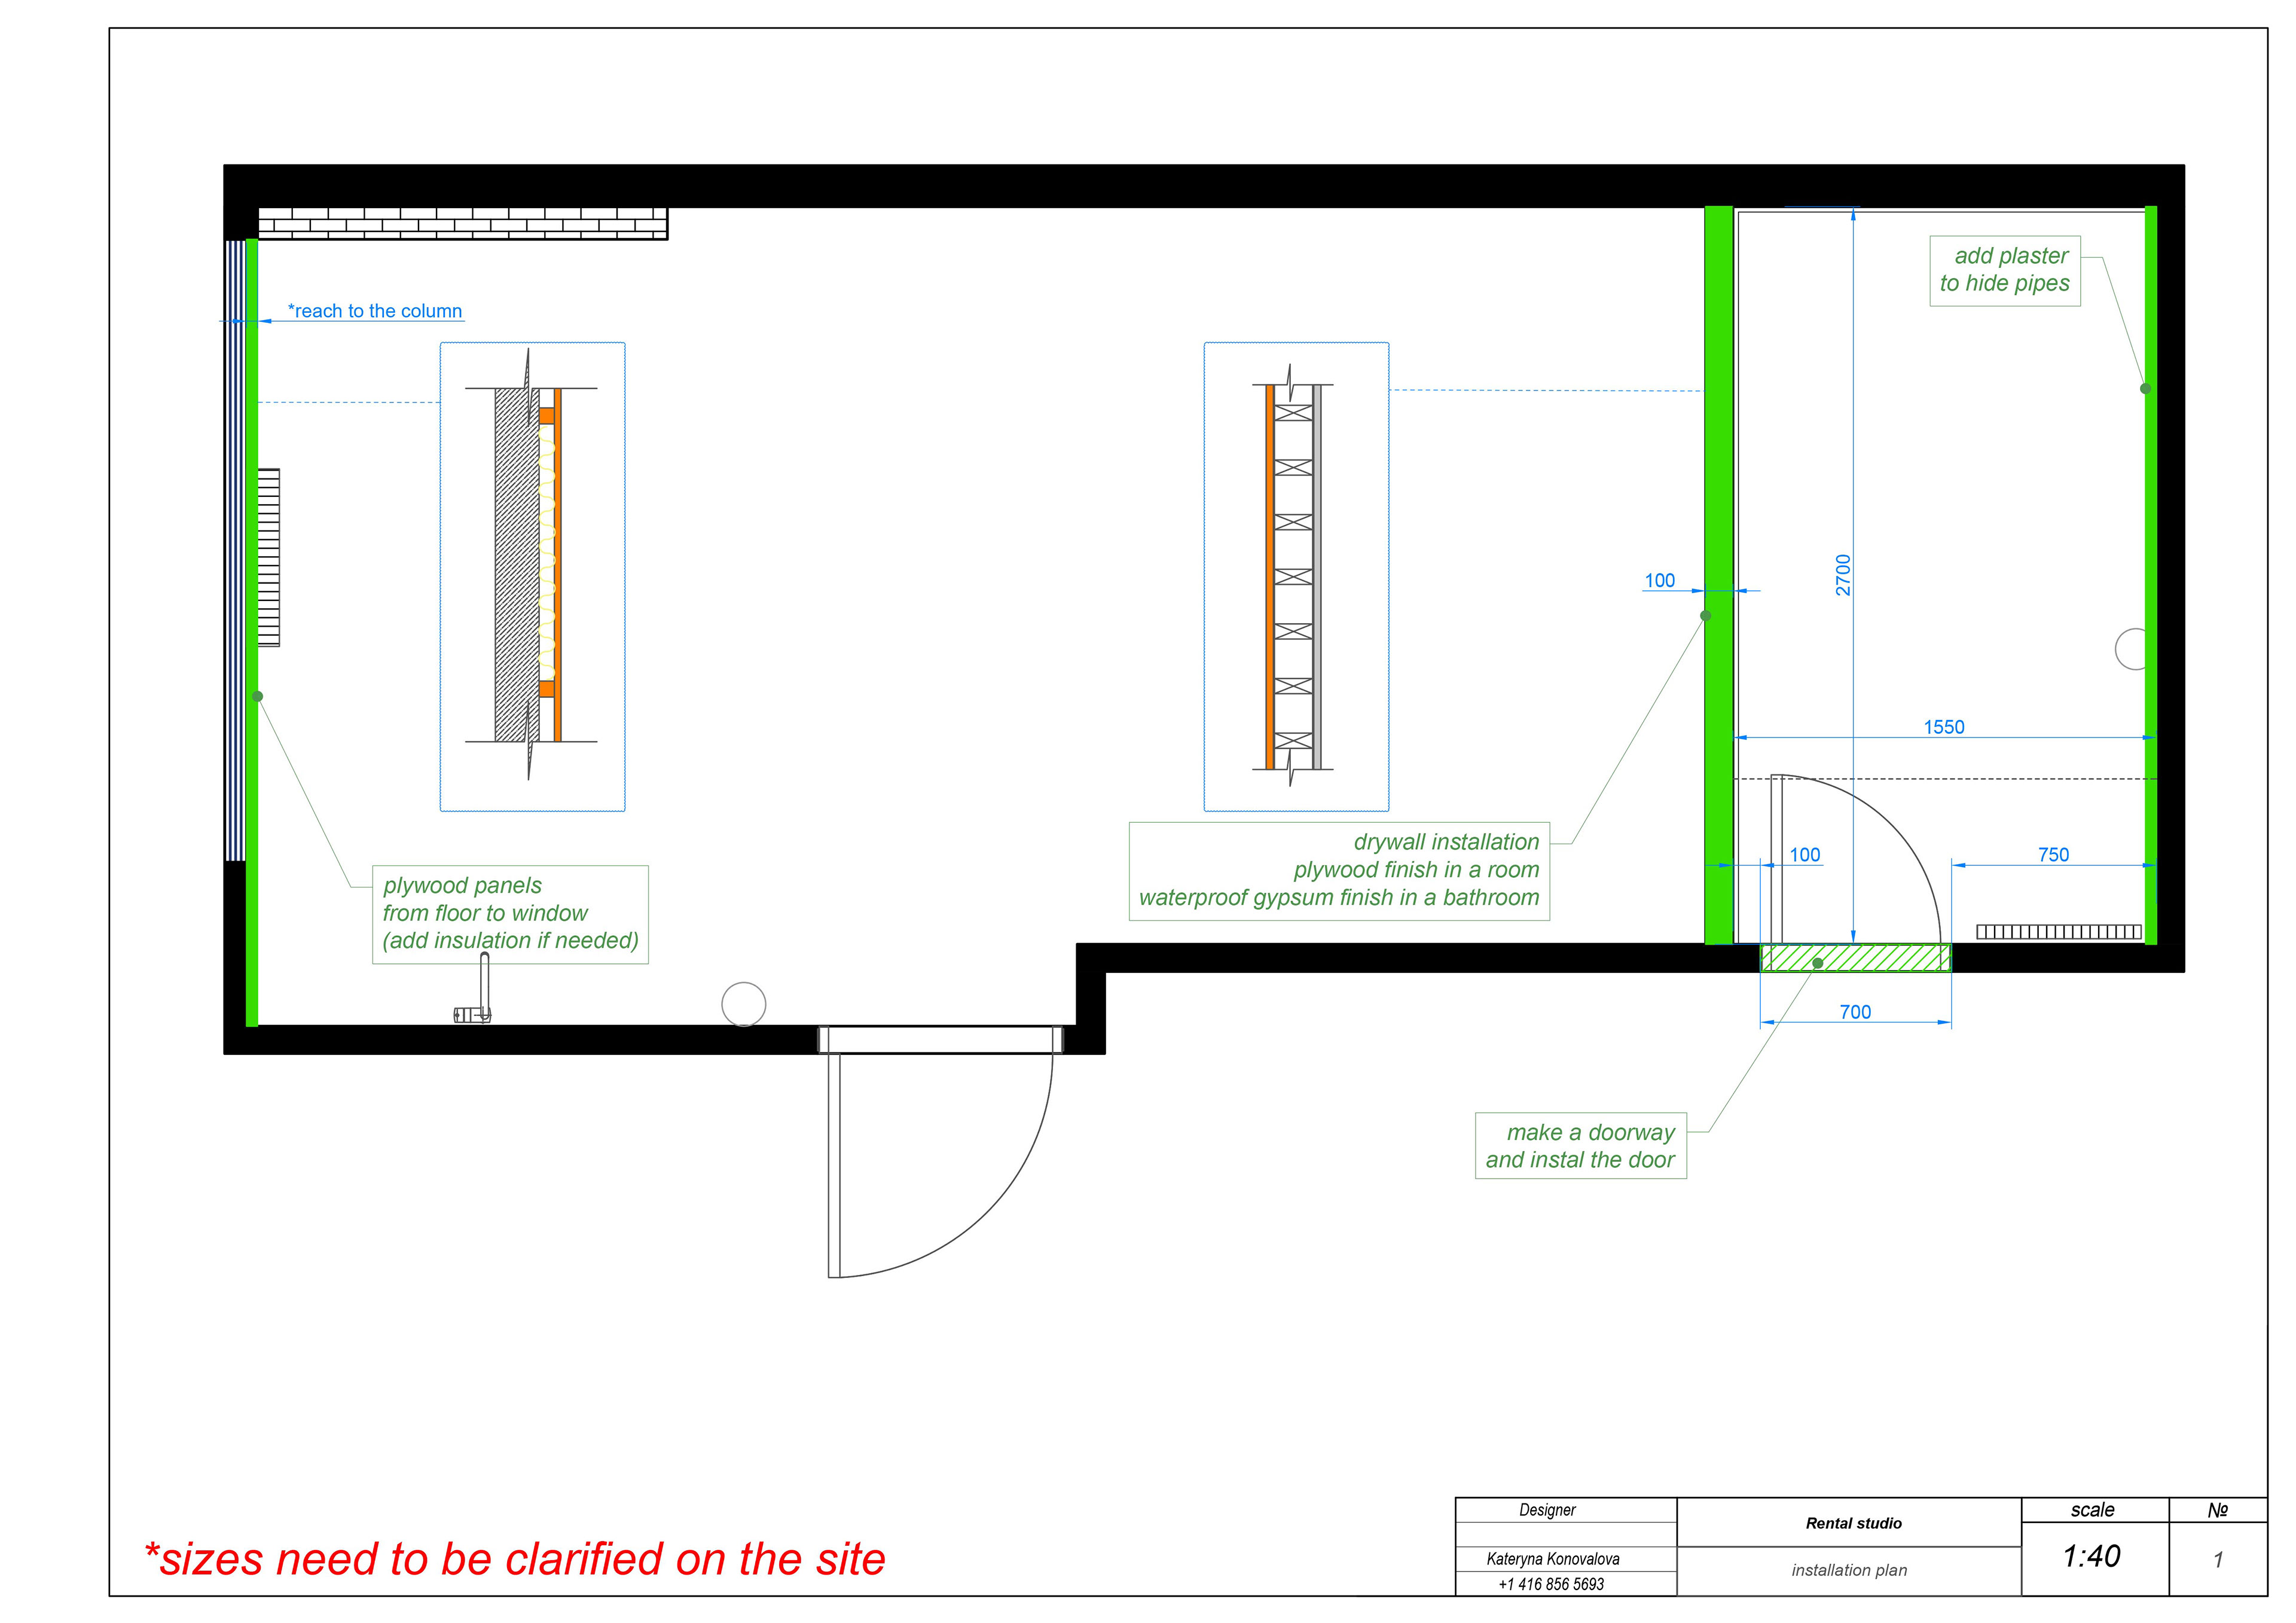
Wall installation Plan
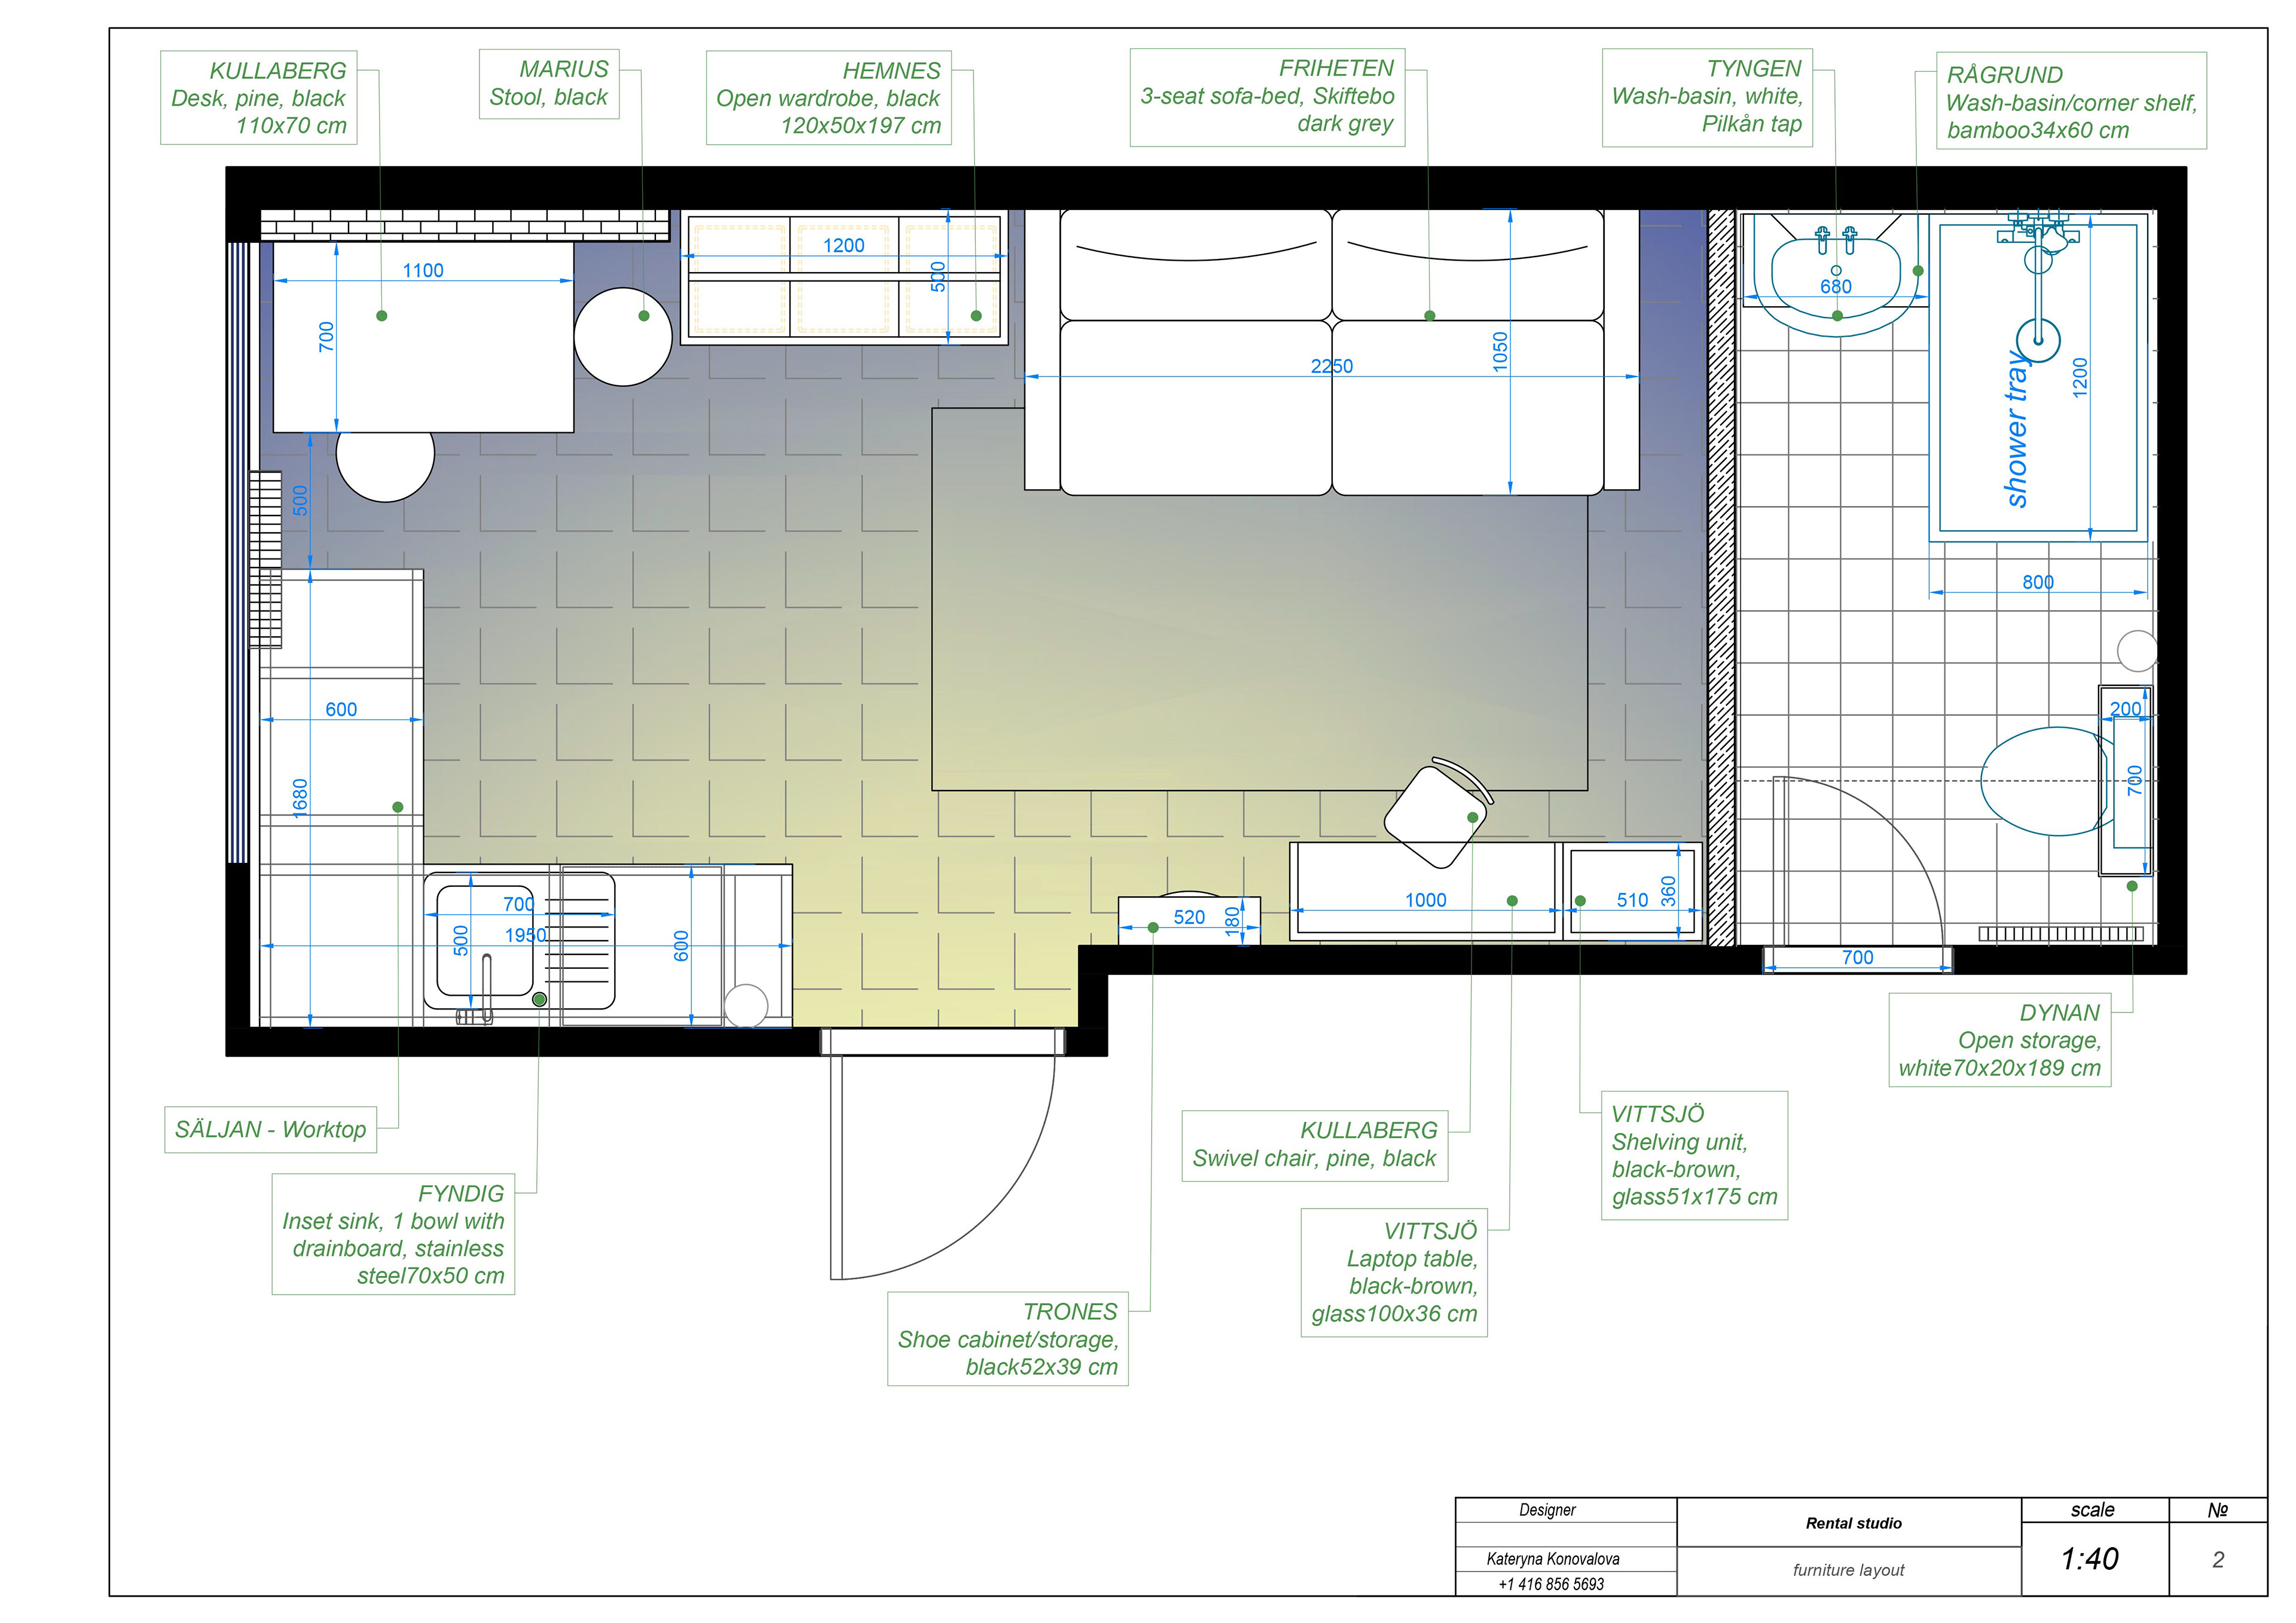
Itemized Furniture Layout

Floor Plan
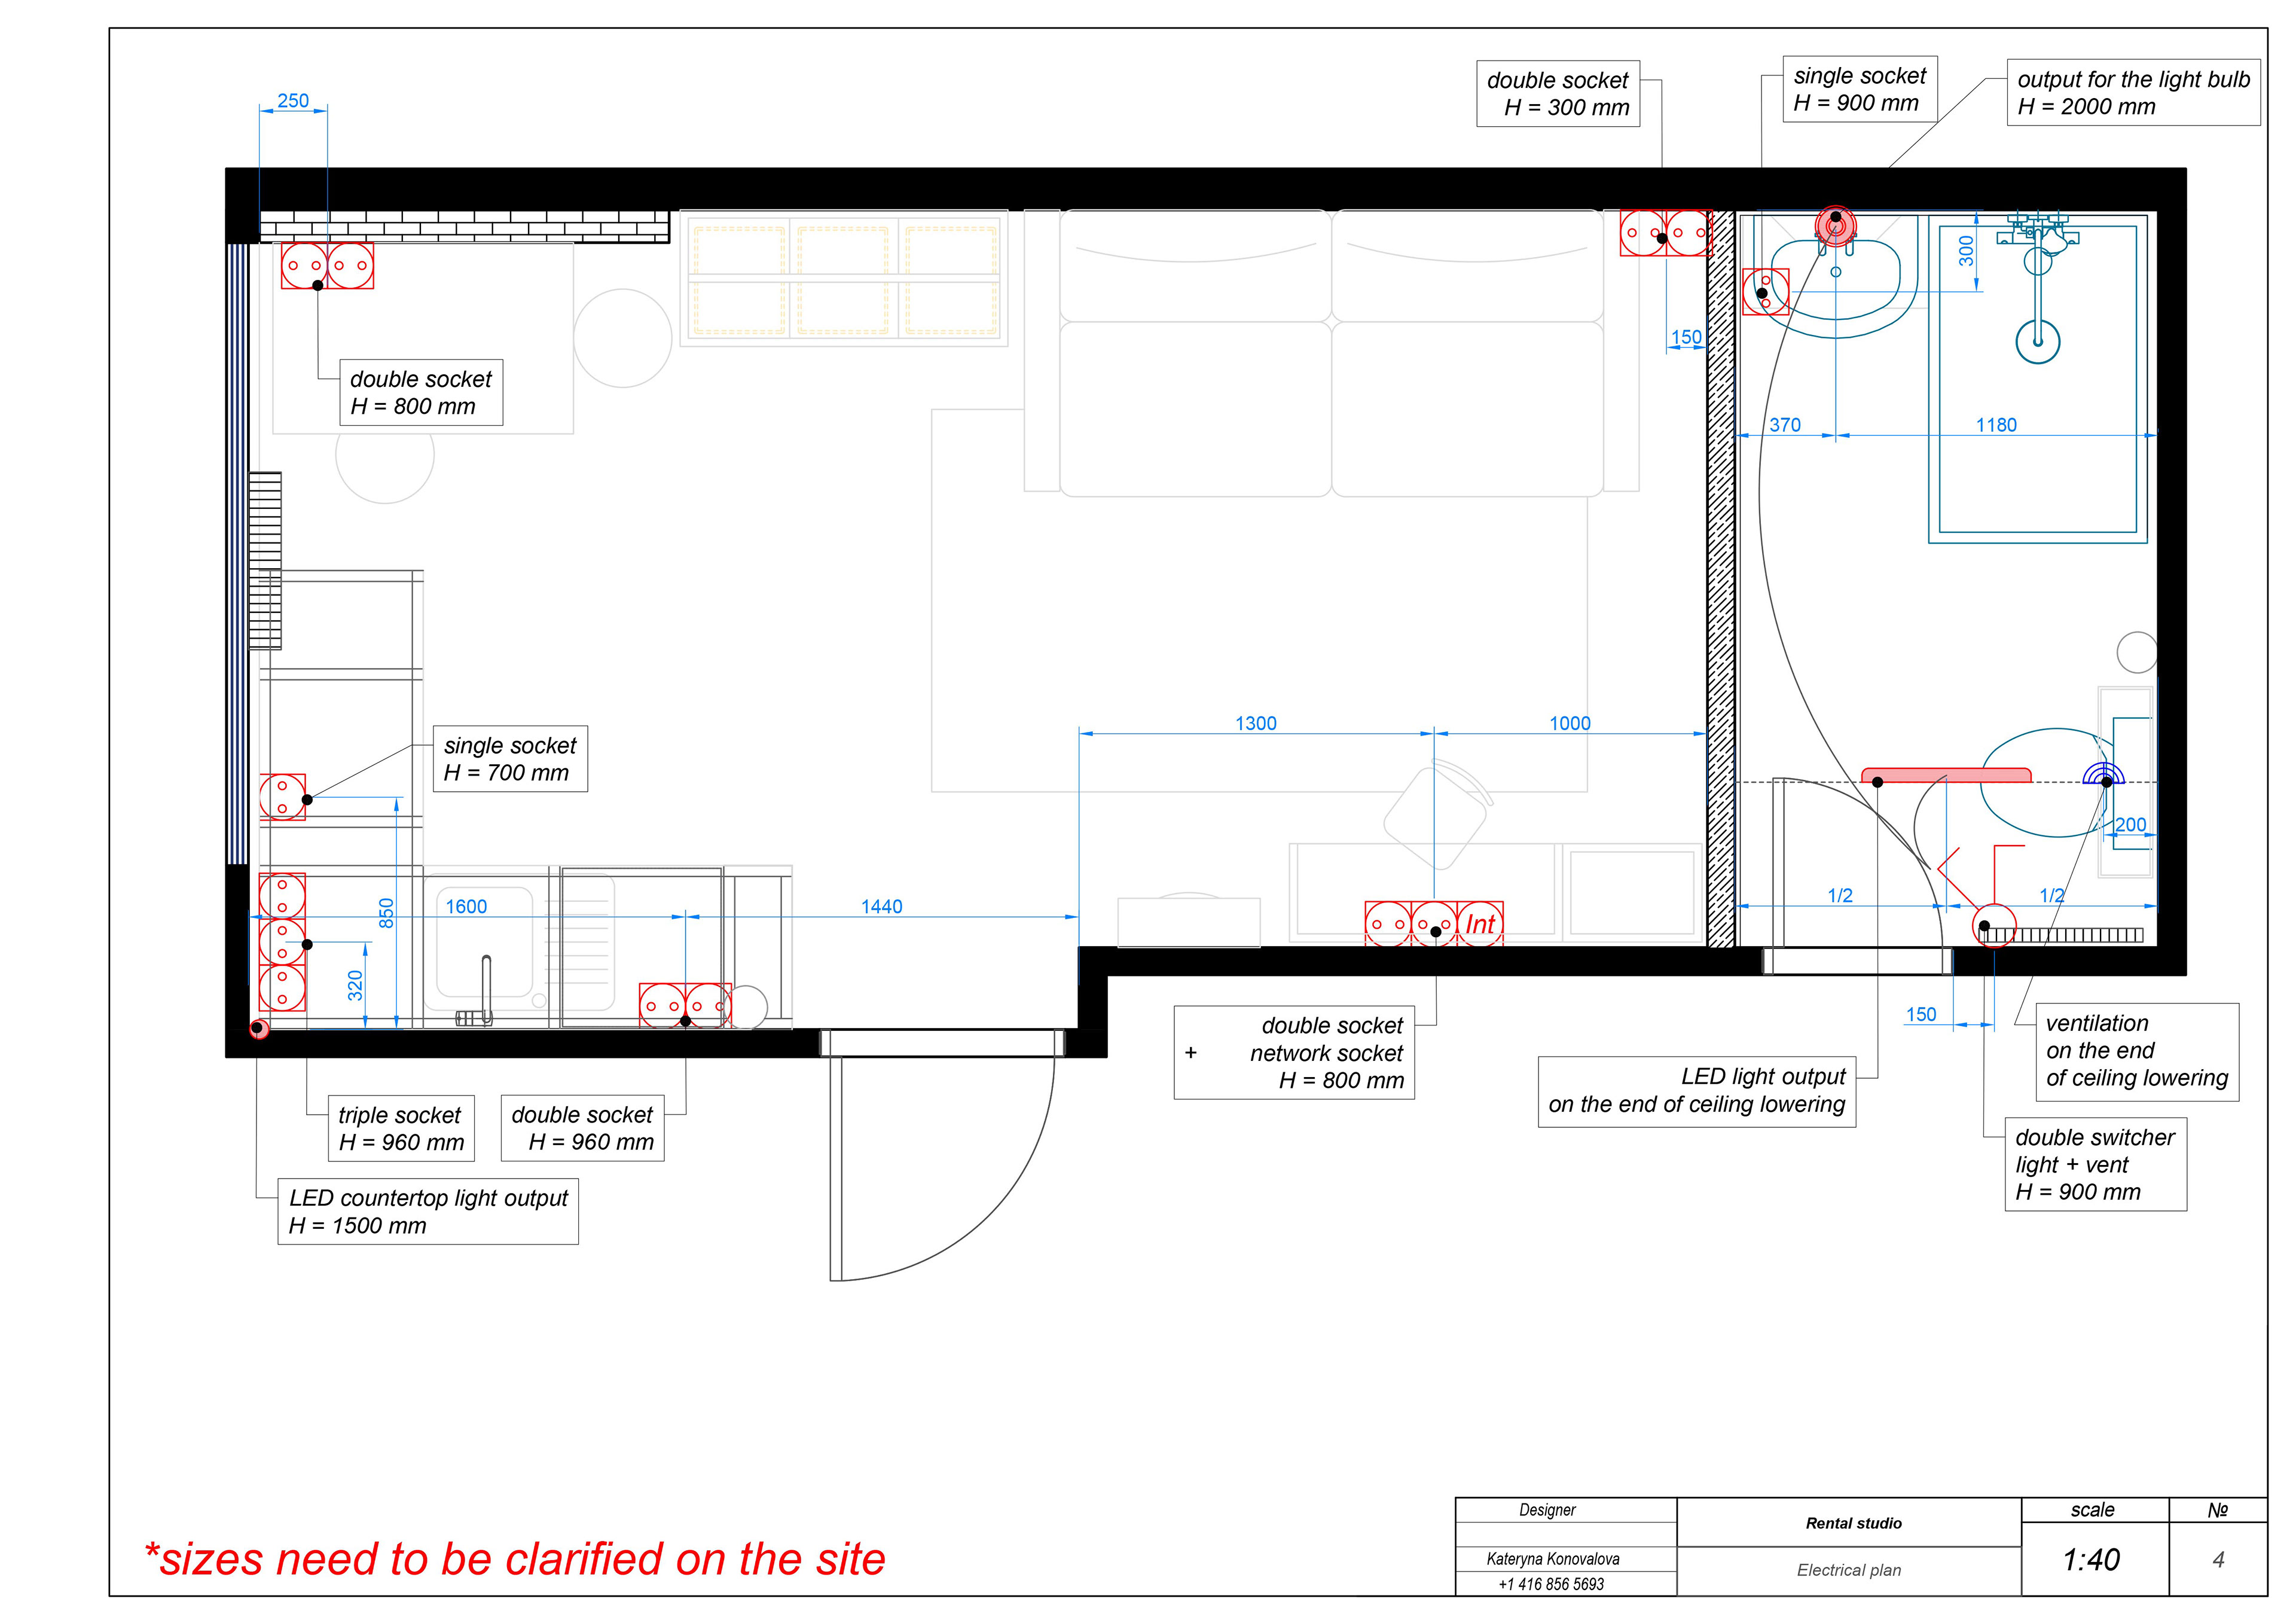
Electrical Outlets Layout

Water Outlets Plan
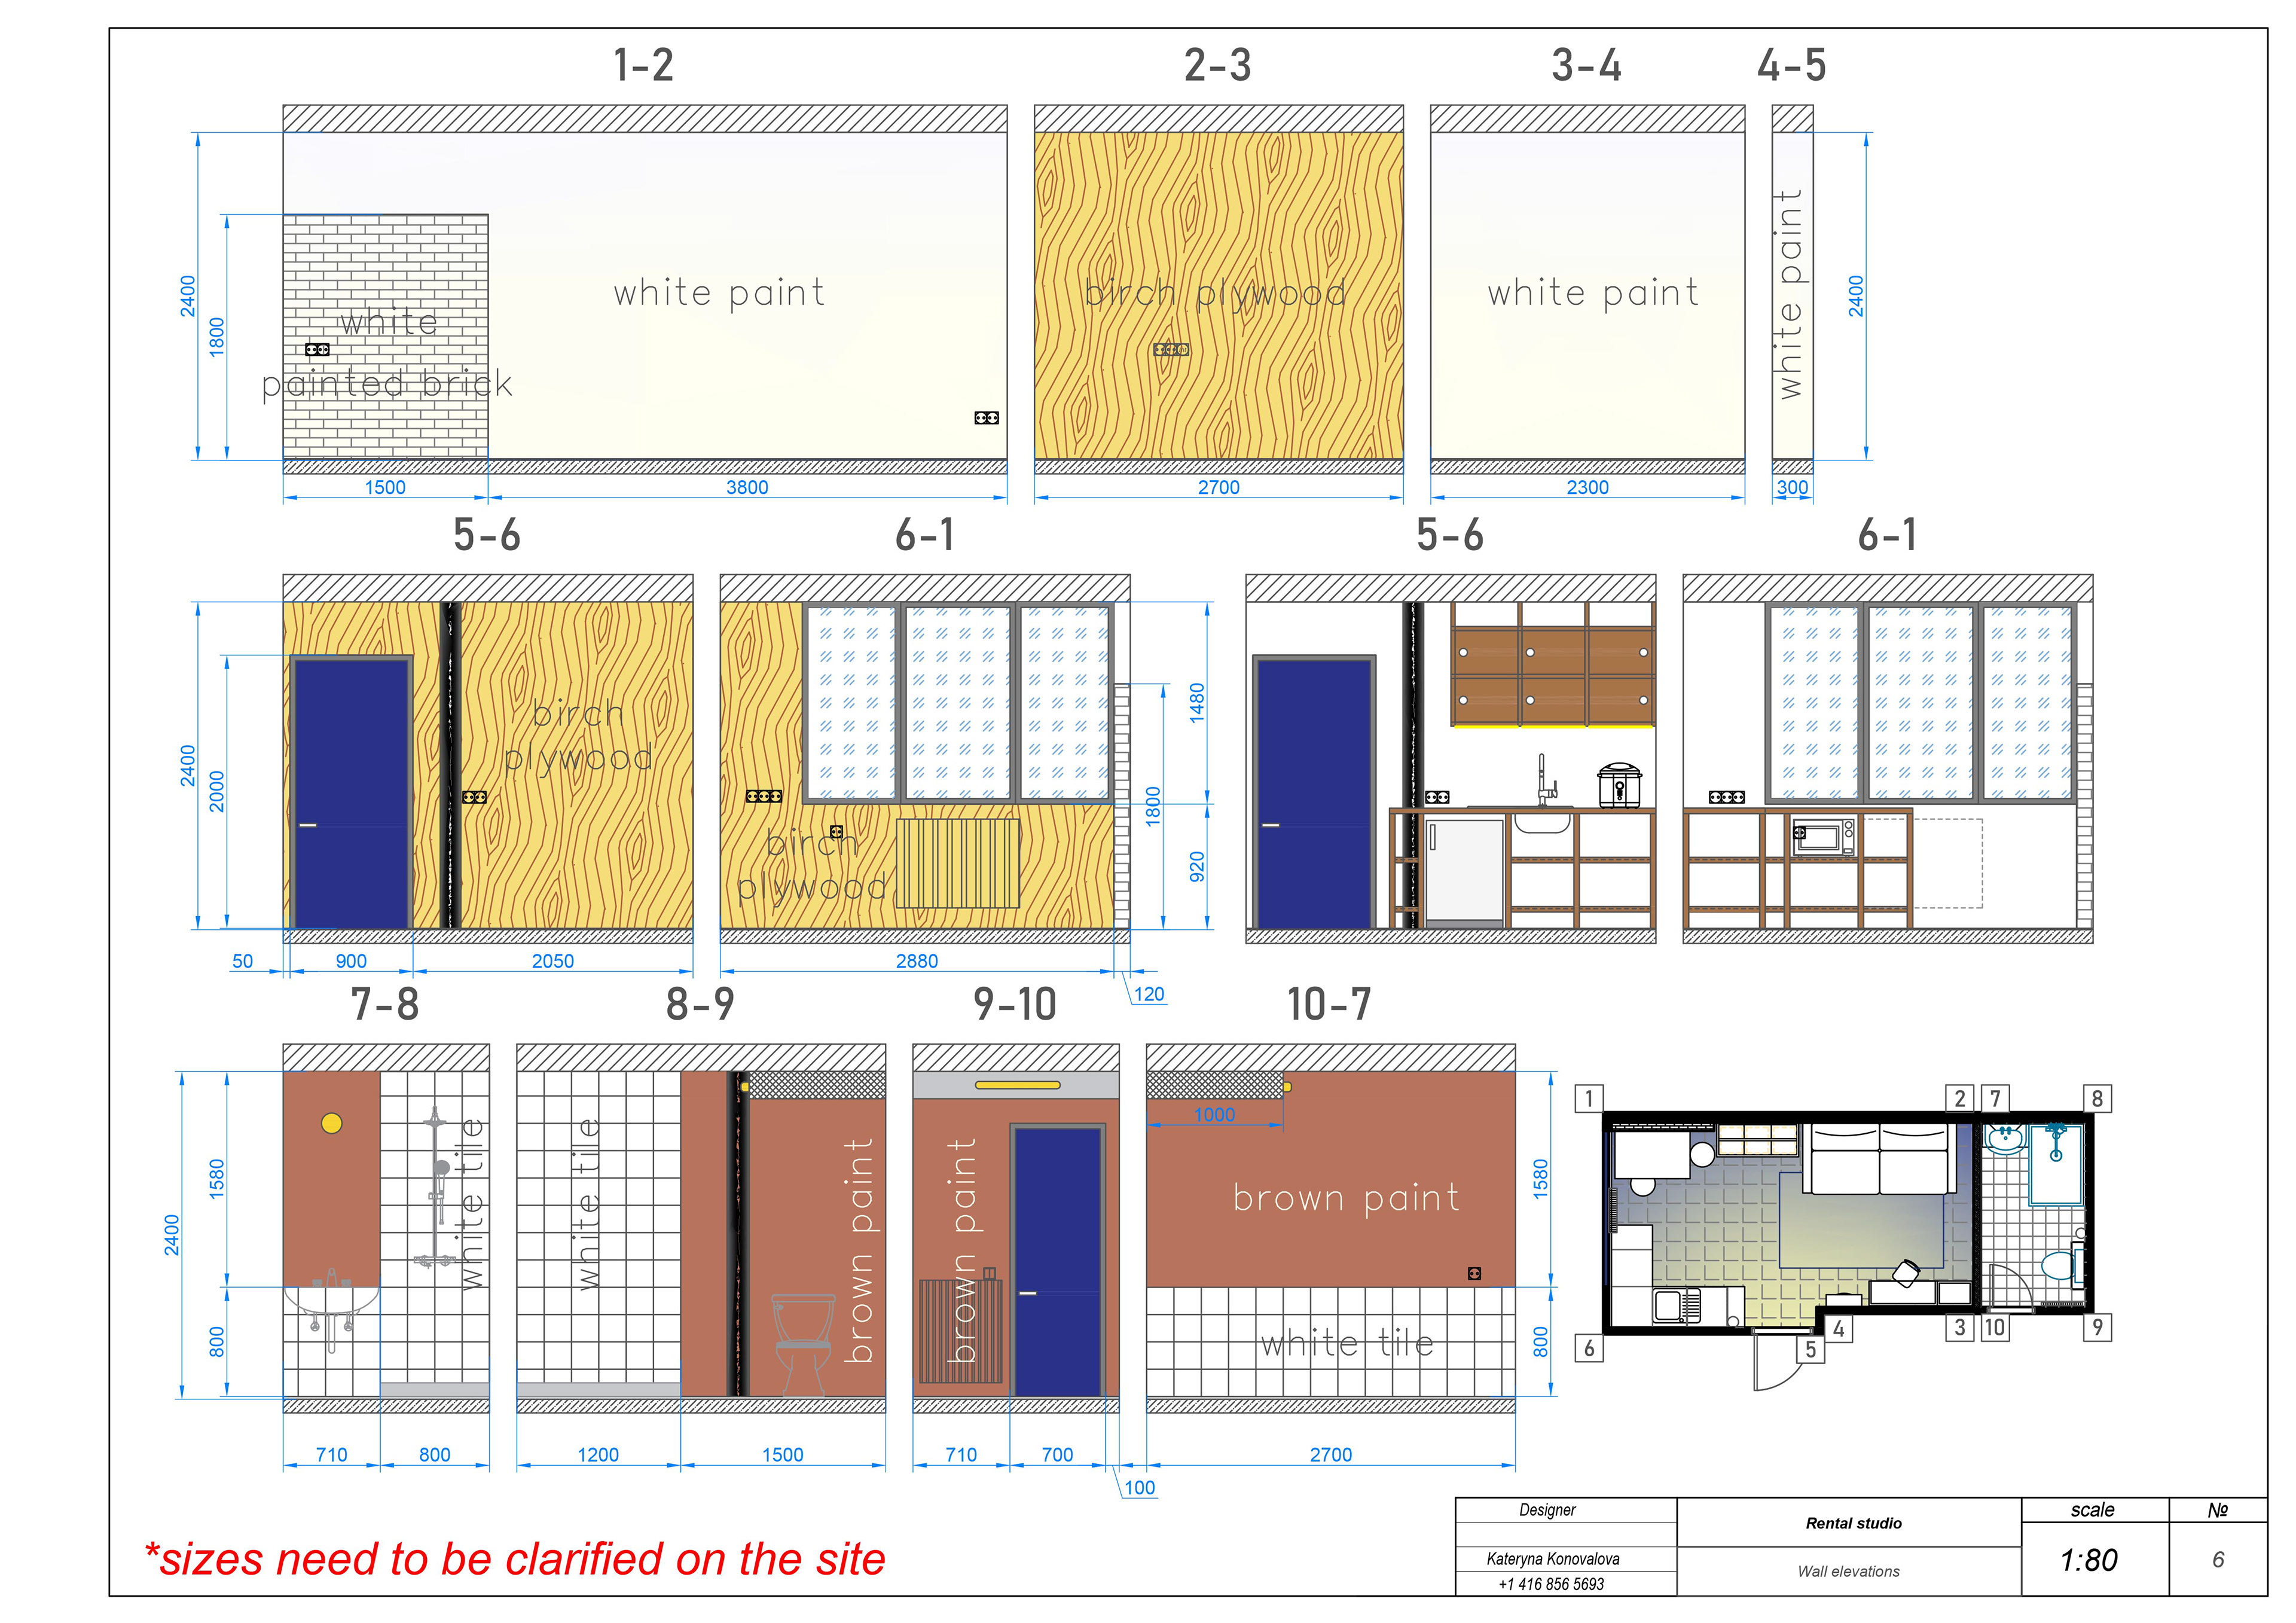
Walls Elevations

Kitchen Cabinetry Dimensions
Drawings for the Project


